Check out this more-than-a-century-old wedge of wood:
We can't tell what kind of wood it is, but its very dry and, therefore, lightweight.
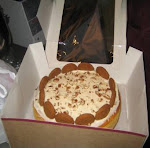
Here's where they came from:
Can you see that thin line of wood? These wedges were used to even out the courses of brick; they became a part of the wall.
There were none of these showing on the outside, only on the inside where the lathe-and-plaster interior finish would cover them up.
These wedges were here, in the last three courses of brick, the only barrier remaining in the new door opening:
It took four hours of hard work and heavy tools to chip these bottom rows out of here!
It's good to know the old building is so tough.
Saturday, June 28, 2008
Entryway - Wooden Wedges, Tough Bricks and Mortar
Tuesday, June 24, 2008
Tile
I am finished laying tile! All the edge pieces got mudded in today!
I am relieved.
Now I have to grout.
Pictures soon....
Monday, June 23, 2008
Tile Pictures
Thankfully, I'm much further along than when I took these pictures:


Yep, that's me:
I spent the weekend cutting most of the edge pieces; the tile is almost done, so I'll be able to catch up with the blogging.
We poured more concrete on Saturday morning, so I'll show you what that was all about, too.
Friday, June 20, 2008
Floor Tile
We've got quite the impressive mess in the parking lot.
Again.
In the last post I showed you the clean floor - and it's so clean because everything went outside to the parking lot (okay, some went upstairs, but not much).
I'm glad we were able to have a clean parking lot for Mother's Day and Memorial Day, but after that the outside mess multiplied.
It's temporary.
Here's inside looking out through the new door:
To where I was mixing mud:
My trusty drill and mixer blade. The same set-up I used to mix the buckets of drywall mud.
Here's a pretty good start:
I wear knee pads (I haven't thought to take a picture of those, yet), which decreases wear and tear on the knees, but I haven't found anything to help out with the back.
Or the fingers: The concrete dries up my skin and by the time the floor is ready to grout, all the water prunes up my damaged, cracked fingers and produces some pretty odd looking holes.
And the fingernails... let's just say they're looking kinda' rough.
I have more tiling pictures AND I had a brainstorm that really helped me out the other day for piecing in the edges. I'll tell you about that soon.
Thursday, June 19, 2008
Floor Prep and Tile Layout
This is a floor scraper:
Because there is no size reference, I'll tell you that the blade is 14 inches wide. It's a thin piece of flexible metal -think razor blade- on a long, simple pipe handle.
It's a wonderful, back-saving tool and I wish I would have known about it a lot sooner.
I have spent several hours on my hands and knees with a hammer and small chisel to remove the old adhesive from the floor. And it's not just me - all three kids have put in time chiseling, too. That's a lot of time.
And then I found this floor scraper. (Duh.)
It works great, scrapes up everything in seconds and shows me all the imperfections that I have to fix either before (convex - hammer, chisel) or while (concave - concrete) tiling.
Clean floor - at last:
I wanted to start my tile from the front door - or rather, I wanted to measure out from the front door so everything ends up square and uniform at the entrance:
Looking closer, you can see my perpendicular starting lines:
Laying out tools, tile, and a water bucket with rags:
And then it was outside to mix mud (yep, I got pictures of that, too, but I'm just doing a quick catch up with blogs before getting back to work)....
Monday, June 16, 2008
Step Elimination - More concrete
When The 123 was a dentist office, it had a double entrance in from the street: You pushed the commercial door and walked into a small foyer with two doors. One door leads upstairs (it's still there) and the other door (which is not there) led into the waiting room. The walls that created the small hallway -and the waiting room and the reception desk and the exam rooms- are no longer there; they haven't been for some time, but that series of small steps that made up the foyer were still there. Until last weekend.
In order to gain a small amount of floor space and to make fewer corners for tiling, PR and Curtis formed the little instep, mixed a couple of bags of concrete, and filled in the hole.
This is PR smoothing out the concrete:


PR (foreground) and Curtis (doorway) finishing up:
This creates a 3 foot wide entry with just one step up and no asides leading to the door at the bottom of the steps.
I've already tiled over it; I'll be getting those pics up soon, but I'm leaving now to go tile some more....
Friday, June 13, 2008
Entryway Construction - Part 3
PC, PR, & Curtis opened up the doorway last weekend.
Here's PR:

This has been the plan all along, but it's one thing to visualize an idea and something else to actually see it become reality. I was excited when I went down Saturday morning and walked through the wall for the first time.
Look at that! A doorway!
I'm still fascinated with the brick work from more than a century ago.
Here's the cross section of the cut in the wall:
If you look closely, you can see wooden wedges in some of these brick courses (more on this later...).
And inside looking out:
The line of sight looking down Main Street is amazing! This is exactly what we wanted to see even before the very first inspection hole PC cut in the brick.
[See the red caboose?]
Exciting!
Thursday, June 12, 2008
Busy, busy, busy...
Just because I haven't been keeping up with the blog doesn't mean there's nothing going on. As a matter of fact, there's so much going on, I haven't had time to blog.
There is now a door-shaped hole in the wall.
The entryway roof is tar papered.
The interior floor is scraped down to bare concrete and the tiling has begun.
I'll be posting pictures soon....
Monday, June 2, 2008
Entryway Construction - Part 2
This brick is at least 118 years old:
These bricks are solid and heavy and now they're in a pile in the parking lot.
See?
It's the first layer of bricks in what will be the doorway.
Looking up:
There are rafters since the last time I posted!

I wanted to get a view from the caboose park so you can see our front entry way from there:
Next time I think I'll go even further down the street and snap a few pictures, too.
I'm getting ready to write a post over at the Taylor County West Virginia Blog about the Caboose Park and I'll add a link that hooks in over here (*link added), too. The caboose is a part of the Civil War Discovery Trail.
Here's a link to West Virginia Tourism's Civil War Discovery Trail page. It doesn't even list this as a stop. It does list the Grafton National Cemetery, though.
Subscribe to:
Posts (Atom)